目地:可計算物件面積跟長跟寬之類...........
比較詳細請看 Lubosz Sarnecki的Github
https://github.com/lubosz/cvblobslib
1.
常應用於AOI錫球之類................
for (int i = 0; i < blobs.GetNumBlobs(); i++ )
{
currentBlob = blobs.GetBlob(i);
//dataGridView1->Rows->Insert(0,"1","2","3");
//p1.x =(int)currentBlob->MinX();
//p1.y =(int)currentBlob->MinY();
//p2.x =(int)currentBlob->MaxX();
//p2.y =(int)currentBlob->MaxY();
dataGridView1->Rows->Insert(0,currentBlob->GetID(),currentBlob->Area(),currentBlob->Perimeter());
}
以目前來看大部分都用
EigenFace
Fisherfaces
Local Binary Patterns
來辨別人臉 ~ 所以彙整一些別人寫的資料範例
1.人臉的圖示可以到下面網址下載
AT&T Laboratories Cambridge (劍橋實驗室所提供):
www.cl.cam.ac.uk/research/dtg/attarchive/facedatabase.html
2.測試一下下載的圖片
3. 使用OpenCV 2.1 + VS 2008工具
Itay Klein的github範例網址:
https://github.com/Kleinitay/vtago
4. 使用 OpenCV 2.4.9 + VS 2012
Philipp Wagner 的github範例網址:
https://github.com/bytefish/libfacerec
5.整合大部分出來的樣式都會像這樣子
另外其他參考:
http://cmp.felk.cvut.cz/~uricamic/flandmark/
假設
1.鏡頭擷取距離固定不變
2.光源不變
身分證樣式用內政部拿來做身分證樣本的圖片
1.首先利用RGB分離
2.
code:
int main(int argc, char** argv)
{
IplImage* img = cvLoadImage("SS1.jpg");
IplImage *img01 = cvCloneImage(img);
cvNamedWindow("gray");
cvNamedWindow("img");
cvNamedWindow("img01");
cvNamedWindow("img02");
IplImage * gray=cvCreateImage(cvGetSize(img),IPL_DEPTH_8U,1);
cvCvtColor(img,gray,CV_RGB2GRAY);
IplImage* pColorImg = cvCreateImage( cvGetSize(img), 8, 3 );
CvMemStorage* storage = cvCreateMemStorage(0);
CvSeq* lines = 0;
cvErode(gray,gray,0,3);
cvDilate(gray,gray,0,1);
FillInternalContours(gray, 200,img01);
IplImage *img02 = cvCloneImage(img01);
int Height=cvGetDimSize(gray,0);
int Width=cvGetDimSize(gray,1);
cvSetImageROI(img02, cvRect(0,0,Width,Height/2.5));
// B G R
cvAddS(img02, cvScalar(-255,-255,-255),img02); // 把值加入到另一個圖片裡
cvResetImageROI(img02);
cvShowImage("gray",gray);
cvShowImage("img",img);
cvShowImage("img01",img01);
cvShowImage("img02",img02);
cvWaitKey(0);
cvDestroyWindow( "gray" );//銷毀視窗
cvDestroyWindow( "img" );//銷毀視窗
cvDestroyWindow( "img01" );//銷毀視窗
cvDestroyWindow( "img02" );//銷毀視窗
cvReleaseImage( &gray ); //釋放圖像
cvReleaseImage( &img ); //釋放圖像
cvReleaseImage( &img01 ); //釋放圖像
cvReleaseImage( &img02 ); //釋放圖像
return 0;
}
3.流程為圖示內所標示~
因為那些函式網路上已經有人有寫了~所以大約流程簡述一下
使用函式 cvErode ~ cvDilate ~ cvAbsDiff ~ UnsharpMask ~ FillInternalContours
(google就可以找到了)
作業環境:
OS : Mac OS 10.8
Xcode 6 => CMake 2.8.12.2 => OpenCV 2.4.9 => Homebrew
1.網址:
http://opencv.org/downloads.html
下載 Version 2.4.9 => OpenCV for Linux/Mac
2. 下載 http://www.cmake.org/download/
CMake 2.8.12.2 ~ 下載好之後點開 ~ 會變成UI畫面
3. where is the source code =>用OpenCV解壓縮到我的文件夾內的opencv-2.4.9
where to build the binaries => 我在opencv 裡面有創一個release資料夾的說
之後按configure => Generate
4. 在Terminal安裝 Homebrew 工具
指令:
ruby -e "$(curl -fsSL https://raw.githubusercontent.com/Homebrew/install/master/install)"
5. 安裝Opencv指令
cd ~/Documents/OpenCV-2.4.9/release
sudo make install
6.跑的結果
第四步~是看檔案有沒有確實安裝
7. 到Xcode6 開啟新檔案 OS X => Application => Command Line Tool => Next
8.隨便取名 ~不過語言記得選C++
9.
10.
11.
Header Search Paths 加入/usr/local/include
12.
Library Search Paths 加入=>/usr/local/lib
13.
程式碼:
#include <iostream>
#include <opencv2/core/core.hpp>
#include <opencv2/highgui/highgui.hpp>
using namespace std;
using namespace cv;
int main(int argc, char* argv[])
{
IplImage* img = cvLoadImage("/Users/apple/Documents/blackhole2.jpg"); //圖檔
cvNamedWindow("Example1",CV_WINDOW_AUTOSIZE);
cvShowImage("Example1", img);
cvWaitKey(0);
cvReleaseImage(&img);
cvDestroyWindow("Example1");
}
OpenCV 在輪廓的應用
參考範例程式碼:
http://docs.opencv.org/doc/tutorials/imgproc/shapedescriptors/find_contours/find_contours.html
利用findContours 跟 drawContours
1.
2.
利用VS2008本身的視窗表單應用在OpenCV
1.
2.
3.因為出現了
error C3862: 'cvRound': 不能以 /clr:pure 或 /clr:safe 編譯 Unmanaged 函式~ 所以加了這一步
要看詳細的話~請參看這個網址:
http://msdn.microsoft.com/zh-tw/library/ms235211%28v=vs.90%29.aspx
4. 在表單上拉元件 ~ 用PictureBox 跟 Button這兩個元件拉
5.拉一個正在關閉的事件
6. 執行結果畫面
程式碼:
#pragma once
#include <cv.h>
#include <highgui.h>
//Global variables
IplImage* src = NULL;
IplImage* hsv = NULL;
IplImage* dst = NULL;
IplImage* v_plane = NULL;
IplImage* h_plane = NULL;
IplImage* s_plane = NULL;
namespace WF001 {
using namespace System;
using namespace System::ComponentModel;
using namespace System::Collections;
using namespace System::Windows::Forms;
using namespace System::Data;
using namespace System::Drawing;
/// <summary>
/// Form1 的摘要
///
/// 警告: 如果您變更這個類別的名稱,就必須變更與這個類別所依據之所有 .resx 檔案關聯的
/// Managed 資源編譯器工具的 'Resource File Name' 屬性。
/// 否則,這些設計工具
/// 將無法與這個表單關聯的當地語系化資源
/// 正確互動。
/// </summary>
public ref class Form1 : public System::Windows::Forms::Form
{
public:
Form1(void)
{
InitializeComponent();
//
//TODO: 在此加入建構函式程式碼
//
}
protected:
/// <summary>
/// 清除任何使用中的資源。
/// </summary>
~Form1()
{
if (components)
{
delete components;
}
}
private: System::Windows::Forms::Button^ button1;
private: System::Windows::Forms::PictureBox^ pictureBox1;
private: System::Windows::Forms::PictureBox^ pictureBox2;
protected:
private:
/// <summary>
/// 設計工具所需的變數。
/// </summary>
System::ComponentModel::Container ^components;
#pragma region Windows Form Designer generated code
/// <summary>
/// 此為設計工具支援所需的方法 - 請勿使用程式碼編輯器修改這個方法的內容。
///
/// </summary>
void InitializeComponent(void)
{
this->button1 = (gcnew System::Windows::Forms::Button());
this->pictureBox1 = (gcnew System::Windows::Forms::PictureBox());
this->pictureBox2 = (gcnew System::Windows::Forms::PictureBox());
(cli::safe_cast<System::ComponentModel::ISupportInitialize^ >(this->pictureBox1))->BeginInit();
(cli::safe_cast<System::ComponentModel::ISupportInitialize^ >(this->pictureBox2))->BeginInit();
this->SuspendLayout();
//
// button1
//
this->button1->Location = System::Drawing::Point(272, 207);
this->button1->Name = L"button1";
this->button1->Size = System::Drawing::Size(215, 53);
this->button1->TabIndex = 0;
this->button1->Text = L"載入轉換";
this->button1->UseVisualStyleBackColor = true;
this->button1->Click += gcnew System::EventHandler(this, &Form1::button1_Click);
//
// pictureBox1
//
this->pictureBox1->Location = System::Drawing::Point(30, 30);
this->pictureBox1->Name = L"pictureBox1";
this->pictureBox1->Size = System::Drawing::Size(194, 153);
this->pictureBox1->TabIndex = 1;
this->pictureBox1->TabStop = false;
//
// pictureBox2
//
this->pictureBox2->Location = System::Drawing::Point(272, 28);
this->pictureBox2->Name = L"pictureBox2";
this->pictureBox2->Size = System::Drawing::Size(215, 154);
this->pictureBox2->TabIndex = 2;
this->pictureBox2->TabStop = false;
//
// Form1
//
this->AutoScaleDimensions = System::Drawing::SizeF(6, 12);
this->AutoScaleMode = System::Windows::Forms::AutoScaleMode::Font;
this->ClientSize = System::Drawing::Size(516, 284);
this->Controls->Add(this->pictureBox2);
this->Controls->Add(this->pictureBox1);
this->Controls->Add(this->button1);
this->Name = L"Form1";
this->Text = L"Form1";
this->Load += gcnew System::EventHandler(this, &Form1::Form1_Load);
this->FormClosing += gcnew System::Windows::Forms::FormClosingEventHandler(this, &Form1::Form1_Closing);
(cli::safe_cast<System::ComponentModel::ISupportInitialize^ >(this->pictureBox1))->EndInit();
(cli::safe_cast<System::ComponentModel::ISupportInitialize^ >(this->pictureBox2))->EndInit();
this->ResumeLayout(false);
}
#pragma endregion
private: System::Void Form1_Load(System::Object^ sender, System::EventArgs^ e) {
}
private: System::Void button1_Click(System::Object^ sender, System::EventArgs^ e) {
src = cvLoadImage("D:\\C3.jpg");
dst = cvCreateImage(cvGetSize(src),8,3);
hsv = cvCreateImage(cvGetSize(src),8,3);
h_plane = cvCreateImage(cvGetSize(src),8,1);
s_plane = cvCreateImage(cvGetSize(src),8,1);
v_plane = cvCreateImage(cvGetSize(src),8,1);
cvCvtColor(src,hsv,CV_BGR2HSV);
cvSplit(hsv,h_plane,s_plane,v_plane,0);
cvEqualizeHist(v_plane,v_plane);
cvMerge(h_plane,s_plane,v_plane,0,hsv);
cvCvtColor(hsv,dst,CV_HSV2BGR);
pictureBox1->Image = gcnew
System::Drawing::Bitmap(src->width,src->height,src->widthStep,
System::Drawing::Imaging::PixelFormat::Format24bppRgb,(System::IntPtr) src->imageData);
pictureBox1->Refresh();
pictureBox2->Image = gcnew
System::Drawing::Bitmap(dst->width,dst->height,dst->widthStep,
System::Drawing::Imaging::PixelFormat::Format24bppRgb,(System::IntPtr) dst->imageData);
pictureBox2->Refresh();
}
private: System::Void Form1_Closing(System::Object^ sender, System::Windows::Forms::FormClosingEventArgs^ e) {
String^ message = "釋放圖片資源";
String^ caption = "關閉視窗提示";
MessageBoxButtons buttons = MessageBoxButtons::YesNo;
System::Windows::Forms::DialogResult result;
// Displays the MessageBox.
result = MessageBox::Show( this, message, caption, buttons );
cvReleaseImage(&src);
cvReleaseImage(&hsv);
cvReleaseImage(&dst);
cvReleaseImage(&h_plane);
cvReleaseImage(&s_plane);
cvReleaseImage(&v_plane);
}
};
}

說明:
換頁 ~ 並把值傳到另外一頁
利用prepareForSegue 函式
1.
2.
3.
4.
5.
6.
7.
8.
9.
10.
11.
12.
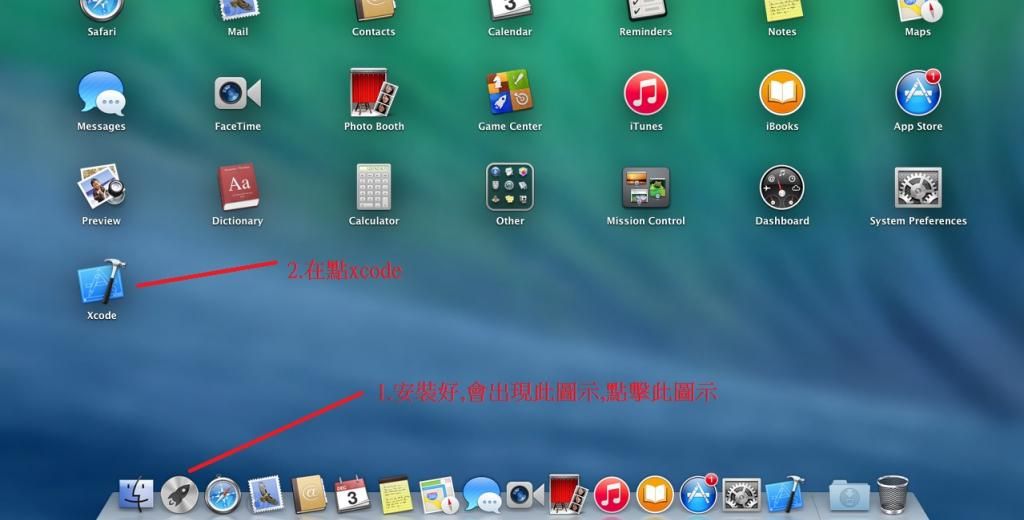
環境OS : MAC 10.9
主要:安裝xcode工具,產生第一個APP
介紹UI物件跟UI事件的觸發
1.
2.
3.
4.
5.
6.
7.
8.
9.
10.
11.
12.
13.
14.


