利用OpenCV的Haar 訓練器 訓練圖片樣本
1.首先要去網路上下載 人臉的圖片樣本 (請用google搜尋face database)
然後存進自己新增的資料夾positives
2.把ㄧ些非人臉的圖片(如背景之類)放進自己新增的資料夾negatives裡面
3.
4.
5.
6. 記得自己要在bin裡面新增一個data資料夾
7.
8.
之後如果要搜尋樣本可以用以下幾個搜尋
face database
hand gesture database
vehicle license plate database
human activity database
DOS:步驟
1.
C:\OpenCV2.1\bin
2.
opencv_createsamples.exe -info positives/positives.txt -vec data/positives.vec -num 3004 -w 20 -h 20
3.
opencv_haartraining.exe -data data/data -vec data/positives.vec -bg negatives/negatives.txt -mem 6000 -w 20 -h 20
修改樣本跟ㄧ些參數
1.
參考 Author: Liu Liu liuliu. 1987+opencv@gmail.com
compareSURFDescriptors
naiveNearestNeighbor
findPairs
flannFindPairs
locatePlanarObject
維基 SURF:
http://en.wikipedia.org/wiki/SURF
Code的話 ~ 只要打 Author: Liu Liu liuliu. 搜尋就有了
1. 直接讀兩個圖檔去比對
2.想想還是把兩張圖檔的特徵值存成XML
利用: File Input and Output using XML and YAML files
網址:
http://docs.opencv.org/doc/tutorials/core/file_input_output_with_xml_yml/file_input_output_with_xml_yml.html
3.讀取XML的速度果然比較快 ~
不過NVIDIA有為OpenCV應用程式開發提供GPU加速
google : Computer Vision on the GPU with OpenCV
載入圖片存成XML ~ 在去搜尋比對圖片
雖然擷取特徵值存在XML裡面 ~在比對搜尋的話 ~如果有100多個圖片
用在視訊的話 ~ 恐怕可能超LAG的說
在玩tesseract-ocr部分,當然要訓練圖形,讓tesseract-ocr原件去擷取特徵值
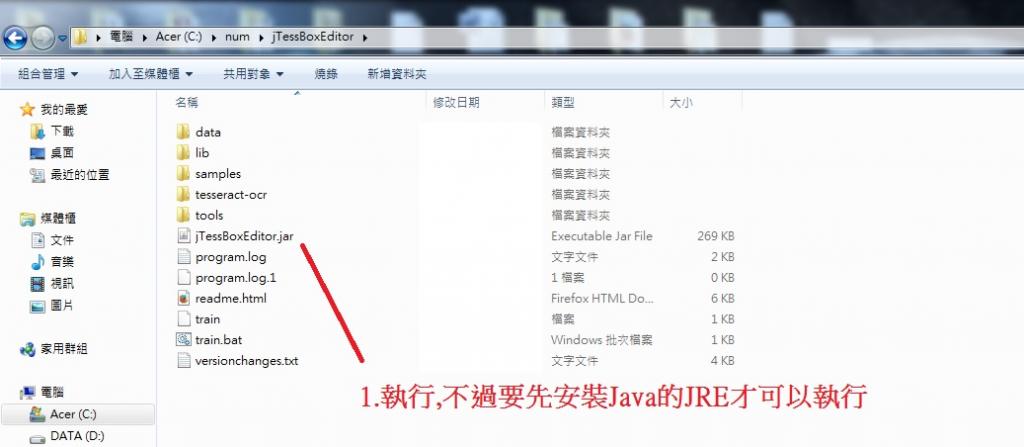
下載: jTessBoxEdit 工具
JTessBoxEdit是方便去框取字元 , 然後輸入字元跟制定座標軸
因為過於簡單 ~ 所以JTessBoxEdit部分 ~ 比較後會補充一下
首先主要講要怎麼製作訓練字元的語言包
因為每個版本都有差異如果要比較詳細的話就參考:
https://code.google.com/p/tesseract-ocr/wiki/TrainingTesseract3
詳細Tesseract 應用技術跟詳細流程文件(推薦):
https://code.google.com/p/tesseract-ocr/wiki/Documentation
1.
網址:http://vietocr.sourceforge.net/training.html
2.
3.
4.
5.
6.
7.
8.
9. cd C:\Program Files (x86)\Tesseract-OCR
10. 輸入 tesseract sel.timesitalic.exp0.tif sel.timesitalic.exp0 box.train
11.輸入 unicharset_extractor sel.timesitalic.exp0.box
12. font_properties 是自己去新增 ~
沒有什麼附檔名 ~ 就是直接命名 font_properties
輸入 timesitalic 1 0 0 1 0
之後DOS 輸入 shapeclustering -F font_properties -U unicharset sel.timesitalic.exp0.tr
13.輸入: mftraining -F font_properties -U unicharset -O unicharset sel.timesitalic.exp0.tr
14.輸入: cntraining sel.timesitalic.exp0.tr
15.
16.
17.輸入 : combine_tessdata sel.
18.
19. 輸入: tesseract.exe sel.timesitalic.exp0.tif ch001 -l sel
如果懶得用jTessBoxEditor 可以直接全部用DOS指令
1.
tesseract sel.timesitalic.exp0.tif sel.timesitalic.exp0 batch.nochop makebox
2.
tesseract sel.timesitalic.exp0.tif sel.timesitalic.exp0 box.train
3.
unicharset_extractor sel.timesitalic.exp0.box
4.
shapeclustering -F font_properties -U unicharset sel.timesitalic.exp0.tr
5.
mftraining -F font_properties -U unicharset -O unicharset sel.timesitalic.exp0.tr
6.
cntraining sel.timesitalic.exp0.tr
7.
combine_tessdata sel.
8.
tesseract.exe sel.timesitalic.exp0.tif ch001 -l sel
jTessBoxEdit 工具利用(附加篇)=>補上之前有一篇的符號辨識
1.
2.
3.
4.
5.
6.
7.
8.
之後照著之前的教學產生語言包去辨識符號
主指:
利用cvFindContour找出輪廓,然後依照輪廓的大小在去排除較小的輪廓
之後截取圖片利用 tesseract-ocr 辨識
缺點:
1.看來在符號部分必須還要在一次細部輪廓大小判別
2.在確認的部分,看來tesseract-ocr對英文跟數字的辨識率蠻高的說,
不過在符號的部分,卻沒有辨識,可能要在利用 tesseract-ocr的訓練器在截取 訓練符號的樣本了
流程:
1.樣本圖片:
2.在cvFindContours 尋找輪廓 ~在DOS部份我顯示出輪廓的高度
3.我把它存成tif檔案 ~但是肉眼一看明顯2.tif就是不及格的圖片
4.所以就加入限制
for (ptr =contours; ptr != NULL; ptr = ptr->h_next)
{
double reg = fabs(cvContourArea(ptr, CV_WHOLE_SEQ));
//if(reg >600 && reg <10000)
{
CvScalar ext_color = CV_RGB( 255, 255, 255 ); //randomly coloring different contours
CvRect rectEst = cvBoundingRect( ptr, 0 );
CvPoint pt1,pt2;
pt1.x = rectEst.x;
pt1.y = rectEst.y;
pt2.x = rectEst.x+ rectEst.width;
pt2.y = rectEst.y+ rectEst.height;
printf("%d \n",(pt2.y-pt1.y));
int thickness =1 ;
cvRectangle( img3, pt1, pt2, CV_RGB(255,255,255 ), thickness );
cvSetImageROI(img,rectEst);
if((pt2.y-pt1.y)>30)
{
object_total++;
char filename[50]; // buff is large enough to hold the entire formatted string
sprintf(filename, "%d.tif", object_total);
// printf(filename);
cvSaveImage(filename,img,0);
}
cvResetImageROI(img);
}
}
5.結合另一篇 (tesseract-ocr 文字辨識 ) 去辨識三張圖片~輸出文字
tesseract::TessBaseAPI api;
api.Init("", "eng", tesseract::OEM_DEFAULT);
api.SetPageSegMode(static_cast<tesseract::PageSegMode>(7));
api.SetOutputName("out");
for(int i=1;i<=object_total;i++){
char image[256];
sprintf(image, "%d.tif", i);
PIX *pixs = pixRead(image);
STRING text_out;
api.ProcessPages(image, NULL, 0, &text_out);
FILE *output;
char itxt[256];
sprintf(itxt, "%d.txt", i);
output=fopen(itxt,"wb");
fwrite( text_out.string(), 1, text_out.length(), output );
fclose(output);
string Text01 = UTF8ToBig5(text_out.string());
cout<<"輸出文字:"<<Text01.c_str()<<endl;
}
擷取樣本圖示:
1.tif
2.tif
3.tif
首先先感謝Google ~ 開放了這麼有趣又簡單操作工具
用Google用繁體搜尋 , 感覺台灣玩的有點不熱絡 , 讓我感覺有點失望的說
不過 tesseract-ocr 資料跟其他應用,還是不少的說
環境:
OS: Win 7 64
VC++ 2008
1.先到此網站下載 tesseract-ocr-setup-3.02.02.exe 安裝
https://code.google.com/p/tesseract-ocr/downloads/list
2.
3.
4.
5.
6.
7.
8.
9.
10.
11.
12.
13.
14.
15.
16. 測試看看 tesseract-ocr 原本的自己exe檔案
17. 查看版本
18. 測試看看英文包
19.測試看看中文包
20.用中文包來測試看看 ~ 英文跟中文夾雜的圖片 ~沒想到還可以測試成功
21.
API參考資料:
http://zdenop.github.io/tesseract-doc/index.html
簡單的程式碼:
#include <baseapi.h>
#include <allheaders.h>
#include <iostream>
#include <fstream>
#include <string>
using namespace std;
string UTF8ToBig5(const std::string& strUTF8);
int main(void){
tesseract::TessBaseAPI api;
api.Init("", "chi_tra", tesseract::OEM_DEFAULT);
api.SetPageSegMode(static_cast<tesseract::PageSegMode>(7));
api.SetOutputName("out");
char image[256]="4.tif";
PIX *pixs = pixRead(image);
STRING text_out;
api.ProcessPages(image, NULL, 0, &text_out);
FILE *output;
output=fopen("test.txt","wb");
fwrite( text_out.string(), 1, text_out.length(), output );
fclose(output);
string Text01 = UTF8ToBig5(text_out.string());
cout<<"輸出文字:"<<Text01.c_str()<<endl;
system("pause");
}
string UTF8ToBig5(const std::string& strUTF8)
{
int len = MultiByteToWideChar(CP_UTF8, 0, strUTF8.c_str(), -1, NULL, 0);
unsigned short * wszBig5 = new unsigned short[len + 1];
memset(wszBig5, 0, len * 2 + 2);
MultiByteToWideChar(CP_UTF8, 0,LPCSTR(strUTF8.c_str()), -1, LPWSTR(wszBig5), len);
len = WideCharToMultiByte(CP_ACP, 0,LPCWSTR(wszBig5), -1, NULL, 0, NULL, NULL);
char *szBig5 = new char[len + 1];
memset(szBig5, 0, len + 1);
WideCharToMultiByte(CP_ACP,0, LPCWSTR(wszBig5), -1, szBig5, len, NULL, NULL);
std::string strTemp(szBig5);
delete[]szBig5;
delete[]wszBig5;
return strTemp;
}


